OnePlus rolled out the first stable build of OxygenOS 12 based on Android 12 to the OnePlus 8 family and the OnePlus 9R back in March. The update reached to the European OnePlus 8 variants recently in the form a newer build (C.15). However, it seems the software is half-baked and littered with bugs and inconsistencies, as users have been reporting a wide range of issues after installing the Android 12 update. Now, OnePlus has released a fresh new build of OxygenOS 12 for the OnePlus 9R and the OnePlus 8 series that adds to the previous update with a few more optimizations and bug fixes.
Thanks to OnePlus Community member G_Mr_…. for the screenshot!
The new OxygenOS 12 stable update (build number C.16) for the OnePlus 8, 8 Pro, 8T, and the OnePlus 9R has started rolling out gradually across the globe, according to a number of posts on the OnePlus Community forums. The update brings the following changes:
System
[Optimized] the power consumption in some scenarios, improved battery life performance
While the changelog is fairly minimalistic, we hope that there are a plethora of under-the-hood changes to address the glitches. Some users reportedly faced SafetyNet failure events after installing this update, but it got automatically resolved after a few reboots. Notably, the underlying Android security patch level is still March 2022.
Download: OxygenOS 12 C.16 for the OnePlus 8 series and OnePlus 9R
As with all OxygenOS updates, OnePlus is rolling out the latest OxygenOS 12 build for the OnePlus 9R and the OnePlus 8 lineup in a staged fashion. This means that the new release will initially be delivered to a limited number of users, with a broader rollout to follow in the next few days. Once the company confirms that there aren’t any major issues with the update, it will be pushed to more users.
You can either wait for your device to get picked up on the staggered rollout, or you can sideload the update using the download links provided below. We’ll continue to update this article as we get more download links.
Before Magisk became a thing, it was Xposed Framework that vastly shaped the device-agnostic Android modding approach. Rather than having to decompile applications, modify bits and pieces, recompile, and push the modded files back to our devices, we can replace any method in any class at runtime using Xposed and a purpose-built module. The framework is essentially a modification of /system/bin/app_process to load additional JAR files on startup, which allows developers to hook into the Zygote process and can act in its context.
Since Magisk offers an overlay-based modding mechanism (often referred to as “systemless”), one can theoretically create a Magisk module to tinker with the Zygote process without physically modifying the app_process executable. This is where Riru comes in.
What is Riru?
Created by two developers named Rikka and yujincheng08, Riru is a specially crafted Magisk module that offers Xposed-esque functionalities without the need of installing the old school Xposed Framework. It injects into Zygote in order to allow other modules to run their codes in apps or the system server.
How does Riru work?
The initial implementation of Riru relied on the replacement of a particular system library called libmemtrack. However, the method was later abandoned in favor of a system property known as the “native bridge” (ro.dalvik.vm.native.bridge). By exploiting the property, the developers can dynamically load and unload shared libraries of their choice, which ultimately leads to injecting into the Zygote process.
How to download and install Riru?
As mentioned earlier, Riru is available as a Magisk module. Due to the fact that the Magisk app no longer comes with a built-in module browser, you need to download Riru straight from its GitHub repository.
After downloading the release ZIP file, you can install it using the Magisk app.
If you’re downloading on a PC or a Mac, then connect your Android device to it and copy the downloaded ZIP file to the internal memory of the target device.
Open the Magisk app on your phone and switch to the Modules tab using the bottom navigation menu.
Tap on the button named Install from storage.
Browse and select the module ZIP you downloaded earlier.
Magisk will now install the module and prompt you to restart.
If everything goes right, you can see Riru listed under the Modules tab of the Magisk app after rebooting.
What can I do with Riru?
Riru itself is just a doorway for other modules to hook into the Zygote process. As such, you need to install Riru-compatible modules via the Magisk app, just like any other Magisk modules. After a successful installation, Riru modules will be listed alongside Magisk modules in the Magisk app. You can then open the module-specific configuration front-end to modify its parameters. For the modules that have no interface, you can simply continue using your modded Android instance and Riru will take care of everything in the background.
What is the difference between Riru and Zygisk?
On newer versions of Magisk, you may face a situation where Riru is disabled after installation due to the presence of Zygisk.
The reason behind this conflict is rather simple, though. Zygisk (e.g. Magisk in Zygote) is the spiritual successor to Riru. It’s the evolution of the systemless interface that XDA Senior Recognized Developer topjohnwu (i.e. the creator of Magisk) and several other developers have been working on for a while. As both Riru and Zygisk target the Android Zygote process, these two can’t exist simultaneously. However, you can disable Zygisk from Magisk’s setting, reboot the device, and then enable Riru.
As a matter of fact, the maintainers of Riru practically stopped developing the project a while ago. They suggested module developers switch to Zygisk in the future. However, Zygisk is still in a nascent stage and there is a lot of scope for improvement, hence the migration will take time. Meanwhile, you can continue to use Riru and its modules.
Shortly after the first image of the Pixel Watch leaked, it seems that we’re getting a complete look at the full device for the first time. According to a report from Android Central, one of the publication’s readers found an abandoned Pixel Watch in a restaurant, took photos, and sent it in. While we don’t know much about the specs of the watch, we know that it’ll likely be unveiled at this year’s Google I/O.
Sadly the reader had no luck in booting the watch and taking a look around the software. The furthest they could apparently see into the device was the boot-up logo being a “G”, and it doesn’t go further than that. The source said this watch could be “a testing model for the Internal Pixel team,” though it isn’t confirmed.
However, the images above match what we’ve seen already, suggesting that this is indeed the Pixel Watch — or a very good copy. It also seems that there’s a button below the crown for sure, and what may be another button above the crown. Previous rumors have suggested that this watch has two buttons, with one of them being a dedicated voice assistant button. The source also said that the bottom of the watch “looks metallic but feels like it’s coated with glass.”
As for the wristband, it seems that it’s a proprietary Google band made of some kind of jelly material. This means that you won’t be able to just slot any watch band on and that you’ll likely need to use Google’s official bands that it will presumably sell.
What’s most interesting about this leak is not that the Pixel Watch was apparently found in a restaurant, but that it was left alongside the box. Assumedly, a Google employee had this device with them and forgot it, but why would they have brought the box with them?
According to Android Central, a message at the bottom of the box states: “This device has not been authorized as required by the rules of the Federal Communications Commission and Industry Canada, nor has it been tested for compliance with EU regulations.”
The same note also states that the model is for “internal testing and development only” and that the “markings and packaging are not final.”
When it comes to comparing phones, there is no comparison more apt than Apple’s iPhone against Samsung’s Galaxy, because they are the two biggest and most prominent phone brands in the world, and in chunks of the world including and especially the US, they represent iOS vs Android for the average consumer. We’ve already pitted the absolute best premium offerings from both brands against each other, now it’s time for the mid-range battle: the third-generation iPhone SE vs the Samsung Galaxy A53 5G.
Samsung Galaxy A53 5G vs Apple iPhone SE 3: Price and Availability
Both the Galaxy A53 and third-generation iPhone SE, which we will call iPhone SE 3 going forward for simplicity, are available practically across the globe. Prices are:
The iPhone SE 3 starts at $429 for the 64GB base variant and jumps to$479 for 128GB or $579 for 256GB storage
The Galaxy A53 in the US comes in only a 128GB variant, priced at $449. Although in some parts of the world, including Hong Kong where I am based, the A53 has a 256GB variant priced at the equivalent of around $510
Samsung Galaxy A53 5G vs Apple iPhone SE 3: Specifications
Specifications
Apple iPhone SE (2022)
Samsung Galaxy A53 5G
Build
Aluminum mid-frame
Glass front and back
Plastic mid-frame
Plastic back
Gorilla Glass 5 front
Dimensions & Weight
138.4 x 67.3 x 7.3 mm
144g
74.8 x 159.6 x 8.1mm
189 g
Display
4.7-inch Retina IPS LCD
750 x 1334
60Hz refresh rate
6.5-inch Super AMOLED
1080 x 2400
120Hz refresh rate
SoC
A15 Bionic
Exynos 1280
RAM & Storage
RAM not disclosed
64GB/128GB/256GB
6/8GB RAM
128GB/256GB
Battery & Charging
Battery size not disclosed
15W wired fast charging
8W wireless charging
No charger in box
5,000mAh
25W wired fast charging
No charger in box
Security
Touch ID capacitive fingerprint scanner
Optical in-display fingerprint scanner
Rear Camera(s)
Primary: 12MP f/1.8
64MP f/1.8 Main (with OIS)
12MP f/2.2 Ultra-wide
5MP f/2.4 Depth sensor
5MP f/2.4 Macro
Front Camera
7MP, f/2.2
32MP, f/2.2
Port(s)
USB-C
Lightning
Audio
Stereo speakers
Stereo speakers
Connectivity
5G (mmWave)
Wi-Fi 6 (802.11ax) with 2×2 MIMO
Bluetooth 5.2
NFC
5G (mmWave) for almost all regions and carriers except AT&T in the US
Wi-Fi 6 (802.11ax) with 2×2 MIMO
Bluetooth 5.2
NFC
Software
iOS 15.4
One UI 4.1 over Android 12
Other features
Single physical SIM
Dual physical SIM
About this comparison:This review was written after testing an iPhone SE (2022) provided by Apple Hong Kong and a Galaxy A53 provided by Samsung Hong Kong for the past couple of weeks. Neither Apple nor Samsung had any input in this article
Samsung Galaxy A53 5G vs Apple iPhone SE 3: Design and Hardware
In order to meet this sub-$500 price that’s less than half of what their top phones cost, both Apple and Samsung had to compromise on hardware and features, and it’s interesting to see the opposing approach each brand has taken. Apple has just about sacrificed looks and modern design with the iPhone SE 3: it recycles the same outer shell and components of the five-year-old iPhone 8. And if we’re being honest, the iPhone 8’s design was outdated even back in 2017 — so the iPhone SE 3’s nearly inch-thick bezels, 60Hz LCD display with pointy screen corners feel even older than five years old. But while the phone is no looker, it packs Apple’s absolute flagship 4nm A15 Bionic chip, which is currently the most powerful mobile processor in the world. Let that sink in.
Samsung’s Galaxy A53 5G, meanwhile, has modern looks, with thin bezels, a 120Hz OLED display, and a quad-lens camera system. Of course, if you know your smartphones and you nitpick, you can quickly find areas of compromise like the plastic back and the fact that two of the cameras are somewhat pointless depth and macro sensors. But to the layman’s eyes, the Galaxy A53 5G would not look out of place next to other 2022 release. However, the Galaxy A53 5G is powered by a noticeably mid-tier Exynos SoC.
Apple chose to settle on looks, Samsung chose to settle on brains
In other words, Apple chose to settle on looks, and Samsung chose to settle on brains.
Samsung Galaxy A53 5G vs Apple iPhone SE 3: Display
The giant bezels of the iPhone SE 3 are a divisive point. For a gadget geek like me, and I’m guessing many XDA readers, they’re just far too large, eating into what should be real estate for the screen. But I have heard other consumers — generally the older, more casual crowd — say they don’t mind the bezel, and even welcome the return of the home button, which offers a tactile way to operate the phone as well as bring back Touch ID. That’s fine, I’m willing to concede maybe not everyone cares about thin bezels.
But what can’t be argued is that iPhone SE 3’s 60Hz LCD screen is objectively inferior to the Galaxy A53’s 120Hz OLED panel. Whether it’s looking at photos, watching videos, or reading text, it’s just a more enjoyable experience on the Galaxy A53 — colors pop off the screen more, the display gets brighter and pumps out better contrast. The iPhone SE 3’s 4.7-inch screen is also very cramped by almost any modern smartphone standards. And despite the Galaxy A53 having a much larger 6.5-inch display, I don’t find the phone more difficult to use with one hand, because Android is more one-hand friendly: I can, for example, just put all my core apps at the bottom of the screen, I can use a more dense grid so the space between app icons are smaller (thus less likely to spill out of reach of my thumb vertically or horizontally).
Samsung Galaxy A53 5G vs Apple iPhone SE 3: Silicon and Performance
Apple’s A15 Bionic has no problem outperforming the Qualcomm Snapdragon 8 Gen 1 that’s powering Samsung’s Ultra flagship, so it of course takes an easy win against Samsung’s mid-tier Exynos 1280 chip. I’m not just talking about benchmark numbers, where the A15 Bionic crushes the Exynos 1280, but in real-world usage, I can feel that slight sluggishness in the Galaxy A53 that reminds me “ah this is a mid-tier phone” while the iPhone SE 3 mostly behaves like a flagship (save for the fact I’m viewing content on a display that belongs in 2015).
I want to clarify that the performance of the Galaxy A53 isn’t bad in a vacuum, and if you’re jumping over from another mid-tier Android device, you may not notice anything, but when compared against the iPhone SE 3 (or Android flagships), there are noticeable occasional stutters when doing things like exiting out of an app. One noticeable example of performance is when I jump into each phone’s default photo gallery app to make simple edits to videos, the process is almost instantaneous on the iPhone SE 3 while the Galaxy A53 needs significantly more time to process. Just check out the below clip, the Galaxy A53 takes a second or two just to load the video edit menu, and then took 30 seconds to process a short trim (while the process was instant on the iPhone SE 3).
If you are not a demanding smartphone user — if your usage consists of texting, reading websites, watching YouTube — the Galaxy A53 will be absolutely fine just like the iPhone SE 3. But if you are a heavier user who plays graphically intensive games or does more complicated tasks like editing videos, then the iPhone SE 3 is noticeably more powerful. But then again, do you really want to play graphically intensive games or edit videos on the iPhone SE 3’s screen?
Samsung Galaxy A53 5G vs Apple iPhone SE 3: Cameras
The iPhone SE 3 packs just two cameras: a 12MP, f/1.8 main shooter and a 7MP, f/2.2 front-facing selfie camera. The Galaxy A53 5G has five cameras in all: a quad-lens rear system consisting of a 64MP, f/1.8 main camera, 12MP ultra-wide, and a pair of mostly pointless macro and depth sensors. Around the front, the Galaxy A53 offers a 32MP, f/2.2 selfie camera.
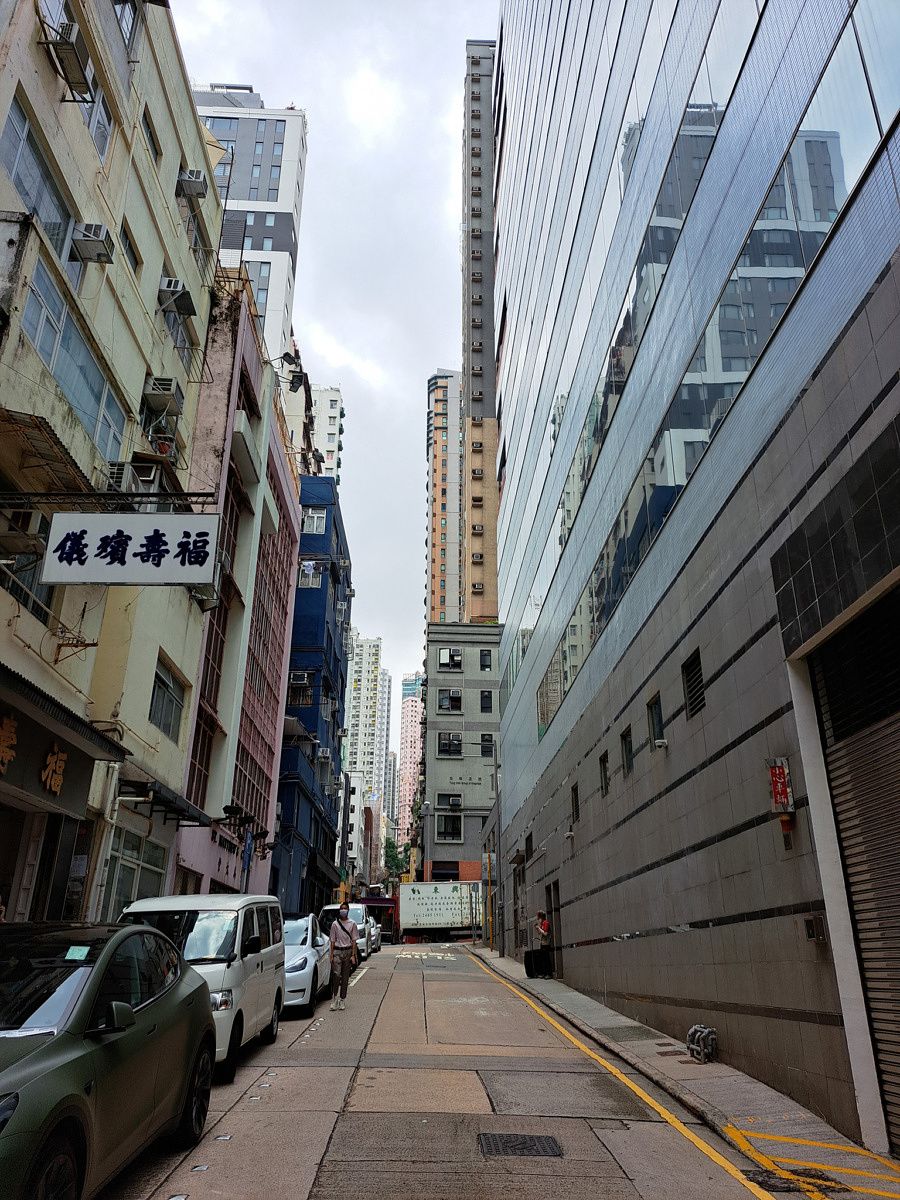
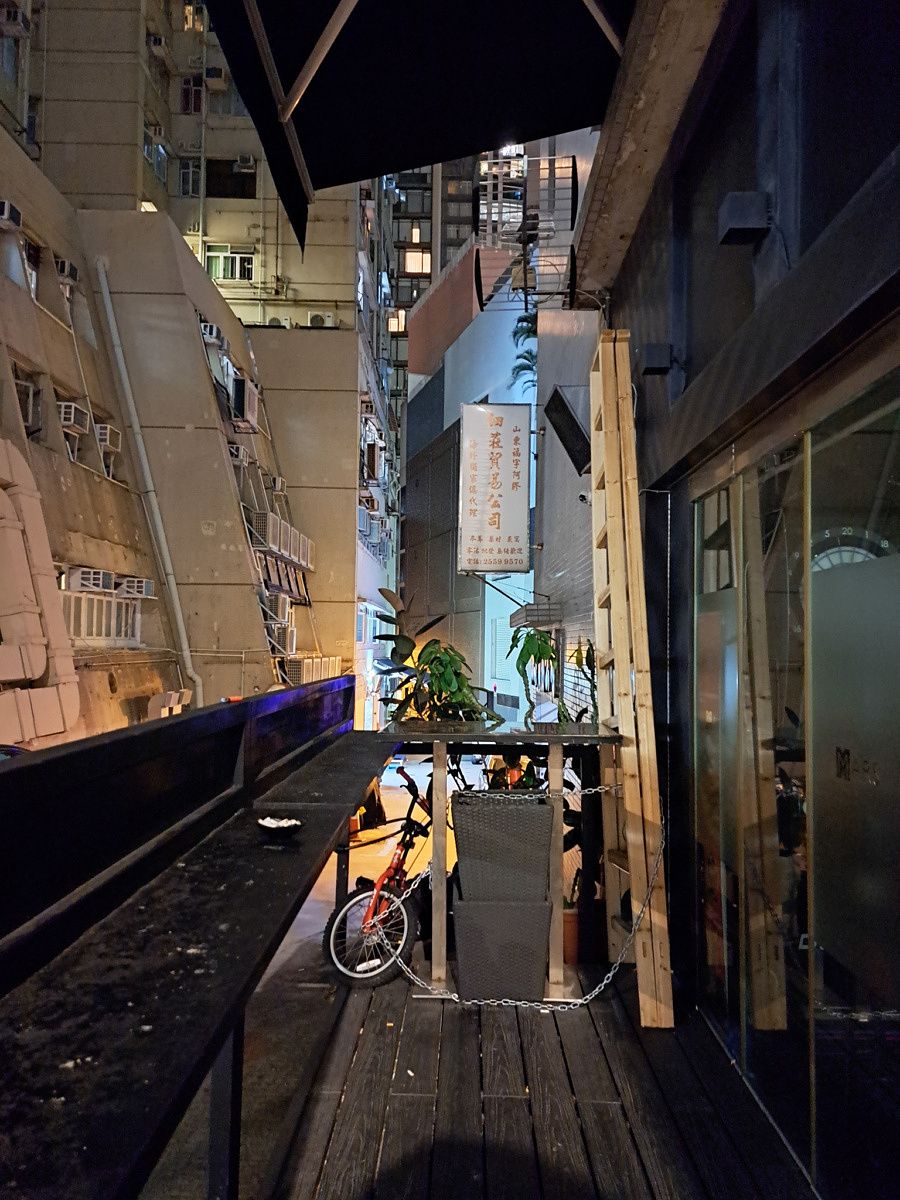
As the number suggests, Samsung’s camera hardware is more powerful. So if you do things like zoom into an image and pixel peep, the Galaxy A53’s more pixel-dense shots will often be sharper, more detailed. Likewise, due to the use of pixel-binning technology and having a larger image sensor, the Galaxy A53’s main camera can gather more light. So if you’re shooting in a really dark scene, the iPhone SE 3 will sometimes outright fail (like in the last set of samples below). Samsung’s camera also tends to dial up the contrast, which produces a shot that may be more visually appealing even if it’s slightly less natural.
However, it’s not all about camera hardware. Software processing is very important, and the A15 Bionic’s ISP (image signal processor) is likely vastly superior to the Exynos 1280’s ISP, because in challenging shots like against harsh backlight (which requires the phone’s brain to analyze the scene and try to produce an HDR shot), sometimes the Galaxy A53 will misfire badly, like in the sample below.
Selfies are fine for both phones. Just like the main camera, the iPhone SE 3’s selfie camera hardware is very dated so it will struggle very badly in low light scenes. But in most normal conditions, it’s perfectly serviceable. If I have to nitpick, I’d say I prefer the iPhone SE 3’s consistency in exposure and keeping my skin tone looking more natural.
One area the Galaxy A53 wins is ultra-wide photography because the iPhone SE 3 doesn’t have an ultra-wide lens at all. So the Galaxy A53’s camera system is just a bit more versatile, able to capture shots like these.
Video recording is another major win for the iPhone SE 3, as it brings over Apple’s best-in-class electronic image stabilization and real-time HDR adjustments. The Galaxy A53, in fact, can’t offer stabilization at 4k/30, so you almost certainly must shoot at just 1080p if you’re hand-holding the phone.
Other Components
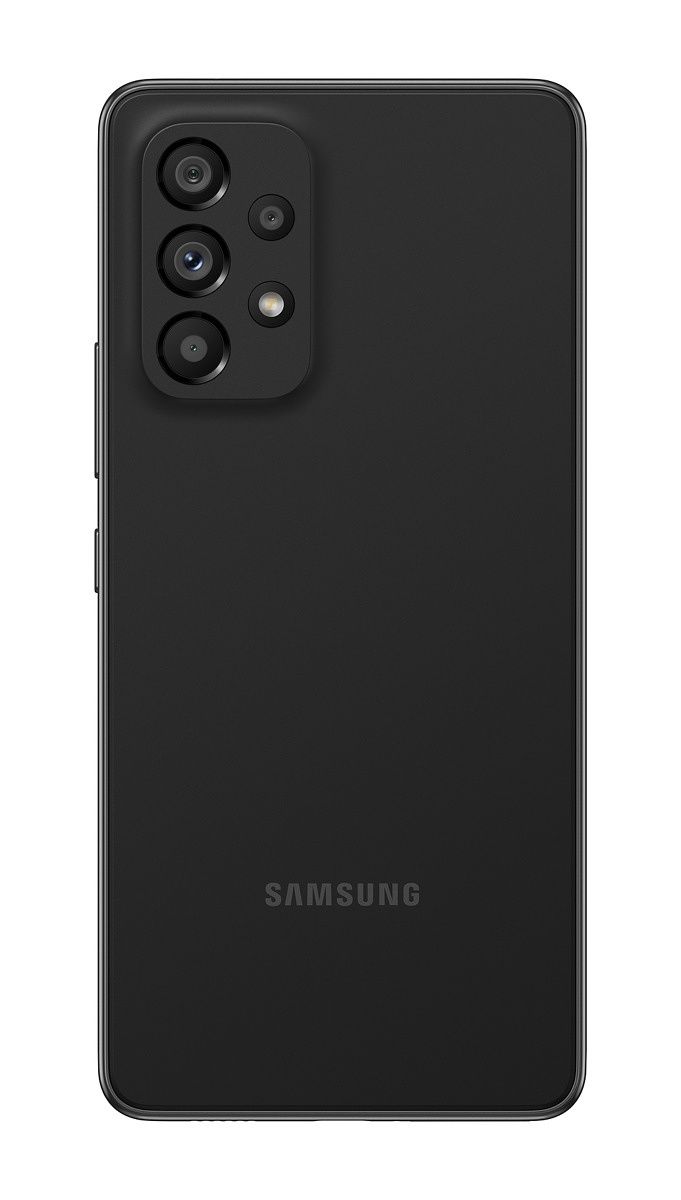
While the iPhone SE 3 looks more outdated, it is built with more premium glass and aluminum material compared to the Galaxy A53’s mostly plastic body. Still, my black version of the iPhone SE 3 attracts fingerprints badly and when it is smudged up, looks quite bad.
In terms of in-hand feel, both phones feel comfortable in the hand for me, but the iPhone SE 3’s absolute dainty size and weight is particularly easy to hold. This is a phone I can hold onto while riding bikes or climbing stairs and not worry about it slipping out of my hand.
The iPhone SE 3’s traditional capacitive fingerprint scanner also works better than the Galaxy A53’s optical in-display scanner, which is noticeably slower than not just the ultrasonic scanner in the Galaxy flagship phones, but also the optical scanners used in Chinese.
In terms of battery capacity and battery life, the Galaxy A53 takes a much-needed win: Samsung’s mid-ranger packs a 5,000 mAh cell that can power the Galaxy A53 all day, while the iPhone SE 3’s battery is tiny by comparison. Apple doesn’t disclose battery specs, but teardowns have revealed it’s a 2,018 mAh cell, one that can’t quite power the iPhone SE 3 all day for my heavy use.
Neither phone pack chargers in the box, but the iPhone SE 3 supports wireless charging while the Galaxy A53 5G can only be charged wired. Fast charging on either phone is nothing to write home about, but the iPhone SE 3 does fast charging worse than the Galaxy A53 5G.
Samsung Galaxy A53 5G vs Apple iPhone SE 3: Software
We have covered iOS vs OneUI enough so we won’t dive too deep here. For the most part, if you’ve used an iPhone or a Galaxy phone in recent years, the user experience will be familiar in the respective family. The noticeable change for the iPhone SE 3 is that, due to it using the older circular home button design, it still uses the old iOS method of button-driven navigation instead of swiping. This also means the iOS Control Center is activated by swiping up from the bottom of the display instead of swiping down from the upper right corner.
The Galaxy A53 5G also behaves mostly like a typical Samsung phone, except it is missing the ability to run Samsung DeX. As mentioned earlier, there are slight performance issues with the Galaxy A53, as I see the occasional animation stutter when jumping in and out of apps.
Samsung Galaxy A53 5G vs Apple iPhone SE 3: Which one should you buy?
Both the iPhone SE 3 and Galaxy A53 5G are capable mid-rangers that excel in some areas while clearly cutting corners in others, so your personal preferences should make this a straightforward decision. If you are someone who really values the display in your gadgets — if your smartphone usage is mostly for visually-driven content like surfing TikTok or watching Netflix — then the Galaxy A53 5G’s much more immersive, superior display has a clear edge. It also has a battery that lasts all day when you push it.
But if your phone usage isn’t driven by consuming content, then the iPhone SE 3 is just a better performer, with a far more powerful brain, smoother UI, and a camera that’s generally more consistent with much better video capabilities too.
If you’ve ever used an e-ink display, it was probably on something like an Amazon Kindle. They have a few advantages over normal displays, though they’re very specific. They’re capable of wide viewing angles with a really low power draw and exceptional daylight visibility, but the advantages stop right about there. Aside from their intended purpose — reading text — e-ink displays are not really good for anything else. They have low refresh rates, image ghosting, and are typically monochromatic. Huawei recently launched the MatePad Paper, but the interesting thing is that it runs HarmonyOS, meaning that you can sideload Android apps on it, too.
Note that during the course of this review, Huawei contacted me and told me that a software update would be rolled out to fix a number of problems that had been reported, and asked me if I could wait before publishing this review. Most of this review was written on that older software version, but where problems have been fixed, I have said as much.
Should you buy the MatePad Paper? It’s complicated. If what you want is a premium e-reader with more versatility than just a Kindle, then the MatePad Paper is worth a look. If you also want to take notes using the included pen, it’s good for that too, though I’m not sure why you’d want to. It’s a bit of a random feature to have, to be honest.
However, if all you want to do is read books and you don’t care how, then honestly, just get something cheaper. This is far too expensive for just reading books and comes in at over twice the price of the Kindle Oasis. For context, a Kindle Oasis (the highest-end Kindle on the market) costs €229. The Huawei MatePad Paper retails for €499 in Europe, which is significantly more expensive. Huawei’s offering will give you more features and last just as long, but it’s up to you if it’s worth the additional investment.
The Huawei MatePad Paper is a Huawei competitor to the Kindle Oasis, and it packs everything and more that you'd expect from an e-reader. Not only that, but it has HarmonyOS too, with support for all of your favorite Android apps.
About thishands-on: Huawei sent us the Huawei MatePad Paper on the 30th of March, 2022. The company did not have any input into the contents of this hands-on.
Huawei MatePad Paper: Specifications
Specification
Huawei MatePad Paper
Dimensions & Weight
225.2 x 182.7 x 6.65mm
360g
Display
10.3-inch e-ink display
1872 x 1404 resolution
SoC
HUAWEI Kirin 820E
RAM & Storage
4GB RAM
64GB storage
Battery & Charging
3,625mAh
22.5W wired fast charging
Security
Top-mounted fingerprint scanner
Rear Camera(s)
N/A
Front Camera(s)
N/A
Port(s)
USB Type-C
Connectivity
802.11 a/b/g/n/ac/ax, 2 x 2 MIMO, 2.4 GHz and 5 GHz
Bluetooth 5.2
Software
HarmonyOS 2
Audio
2 speakers
Accessories
Huawei M-Pencil support
Folio cover
The Huawei MatePad Paper isn’t a normal tablet
The Huawei MatePad Paper is an interesting device for a number of reasons, and there’s a lot to like about it. It’s a neat blend between an Amazon Kindle and an Android tablet, and Huawei is positioning it to be exactly that. It’s significantly more expensive though too, which is why there’s more than just the device itself.
In the box, you get both the Huawei M-Pencil and the Huawei Folio case. If you don’t want to use the tablet with the folio case, the tablet has a larger bezel on the left side for holding it while using your right hand to switch between pages. The M-Pencil can be used for taking notes, and it’s instantaneous when writing on the display. You also get access to AppGallery, meaning there’s a pretty wide selection of apps to choose from, and you can install APK files too online.
To be clear, given that it’s an e-ink display, you’re going to have a very different experience than a typical Android-based device. We tried loading Genshin Impact on it to have some fun, and the results were less than desirable. Some other apps barely work, and the low refresh rate makes any kind of scrolling difficult to achieve. I was able to connect the device to my computer and control it using scrcpy on an older software version, though an update received on the tablet recently broke it.
The tablet itself comes with a pair of speakers that are optimized for spoken word, and not for playback of normal media such as music. Think podcasts and audiobooks.
Other hardware includes the power button doubling up as a fingerprint sensor, a backlight for the display with 32 different levels of brightness, and the screen itself has a paper-like texture. This makes it comfortable for swiping on and writing on, making it feel a little bit more authentic than just a normal tablet. The beauty of e-ink as well is that it’s easier to use in direct lighting, meaning that you can take it outside in the sun and not have any visibility problems in using it.
HarmonyOS modified for e-ink
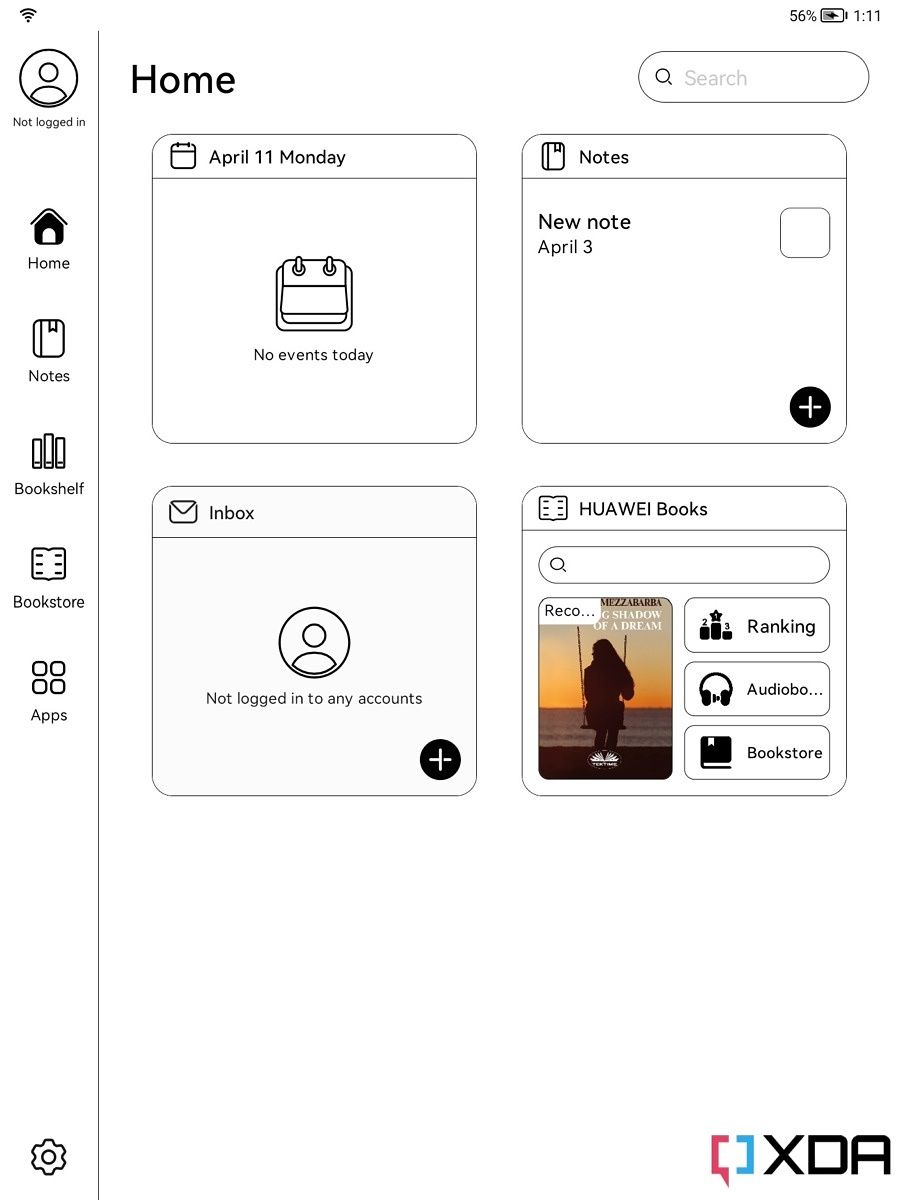
Huawei’s software is quite heavily modified for this display, and you can take a look at some of the screenshots below. Screenshots come out in full color, though the entire UI is designed to be completely monochrome, anyway. It’s nicely laid out for the display and looks really good.
Using this device as an actual e-reader wasn’t possible for me before the most recent software update. Lots of book browsing options didn’t load, except for the ones that did — but only in Spanish. This was rectified, and while I still get a load of Spanish suggestions when browsing the book store, there are also English-language options too that weren’t there previously.
However, I’ve also found that you can load ePub files and others through the likes of ReadEra to great effect, and it’s just as good of an experience as it would be on a Kindle. You can export books from services such as Kobo for use on your Huawei MatePad Paper if you want to read an ePub file. I installed ReadEra using Aurora Store sideloaded, though the official Huawei Books app will open them just fine. The screen itself is rather annoying and cumbersome to navigate, so I used adb to install the Aurora Store APK file rather than downloading it on the device like I normally would.
The Huawei MatePad Paper is an interesting product that’s essentially just a sophisticated Kindle, and I’m not sure how much of an appeal that really holds. It’s expensive, but it’s also a more premium experience than you’ll find pretty much anywhere else readily available. The hardware is fantastic, the speakers are loud and clear, and even the software is more versatile than you’ll get on other devices. If you’ve ever used a Kindle, you’ll get the MatePad Paper.
Is it all worth it, though? It depends. I found that Huawei’s own bookstore was rather limited, and I’d highly recommend using ePub files or other proprietary formats that you can read on Android through the use of third-party apps. The official Huawei books app can actually open them too, though if you’re going to go out of your way to export books from other services, you may as well use a more customizable — not to mention better — e-reader app. The Huawei Books app integrates with the system and essentially pins books to your launcher, so that’s admittedly going to be a better option if all you want to do is open a book and read it.
Given that it’s Android, you can also install Android apps, and those apps include the likes of Genshin Impact. Given the display’s low refresh rate, no games are playable. In fact, even using apps that scroll are pretty painful. Just because it works doesn’t mean you should do it, is basically the lesson learned here.
Overall, this leaves the Huawei MatePad Paper in a weird place. I like it a lot, but the price is hard to justify except for the most niche use cases. No matter though, it’s a premium hardware experience, and it’s enjoyable for what it sets out to do.
The Huawei MatePad Paper is a Huawei competitor to the Kindle Oasis, and it packs everything and more that you'd expect from an e-reader. Not only that, but it has HarmonyOS too, with support for all of your favorite Android apps.
When most people install Magisk modules, they just flash it via the Magisk app and then reboot into Android. When it comes to installing regular flashable ZIP packages, there are custom recovery projects like TWRP that do the job. However, if you’re going to be rooting and tinkering your device, you should probably get used to the command-line interface anyway. Aside from the obvious fact that knowing some shell commands is useful, learning to utilize them can mean not having to flash via another app or connect your smartphone to your PC for sideloading any more than absolutely necessary. This is where the Magic ToolFlash project comes in.
Created by XDA Senior Member huskydg, Magic ToolFlash is a unique take on the Android flashing mechanism. It’s a command-line flash tool that works without a custom recovery environment. All you need to do is download a flashable ZIP on your device. Next, call the tool through any terminal emulator app with root privilege to execute the flashing operation.
Aside from creating an isolated namespace for the sake of security, Magic ToolFlash also shows the detailed flash log to the end-user. You can flash different Magisk modules, the Magisk app itself, as well as other mod ZIP files right from a CLI window on your phone using the flash command after installing this Magisk module. However, the tool can’t be used to install a ROM from a running Android system yet.
Keep in mind that the /tmp directory does not exist on the Android root filesystem. As a result, you might need to modify the updater script and use /dev/tmp as the temporary directory while using Magic ToolFlash. Moreover, if the target flashable zip contains hardcoded /sbin command, it might fail on Android 11 and above operating systems.
If you are a developer and want to explore the codebase of Magic ToolFlash, then take a look at the project’s GitHub repository. A ready-to-use Magisk module version is also available for download under the Releases section of the repo.
When the Google Pixel 6 series launched, there was one noticeable aspect of the device that stood out like a sore thumb. The fingerprint sensor was fairly lackluster to everyone that used it, and there was no face unlock either. While marketing material that leaked prior to launch suggested that face unlock would at least come to the Pixel 6 Pro, there was no sign of it on launch day. Now, a report from 9to5Google (citing a source) suggests that Google is still aiming to bring face unlock to the Pixel 6 Pro, and possibly even as soon as the next Pixel Feature Drop which is scheduled to be released in June.
The weird thing is that hardware-wise, the Pixel 6 and the Pixel 6 Pro are similar in their front-facing cameras, but apparently, only the Pro will get face unlock. There is no additional hardware for face scanning such as Google’s Soli technology that debuted on the Pixel 4, nor is there an IR camera either. Both devices have slightly different front-facing cameras, with the Pixel 6 packing an 8MP camera and the Pixel 6 Pro packing an 11MP camera… but they’re still just cameras with no additional hardware. However, the report from 9to5Google explicitly states that Google’s intentions are to bring it to the Pixel 6 Pro only.
As well, 9to5Google also reports that Google actually pulled support for face unlock for the Pixel 6 Pro right before launch, meaning that it was present already and working at some point. This lines up with the leaked marketing material that we’ve gotten to see, as it suggests that the change was very last minute. We’ve since seen occasional references to it on people’s devices, again suggesting that something funny has been going on with Google.
Currently, the in-display fingerprint scanner remains the only biometric authentication on the Pixel 6 series, and it seems that it’s going to stay the same for the regular Pixel 6.
I love my Steam Deck. So do a lot of other people. But the thing many of the early owners are missing is a good dock. Valve has an official one in the works but it’s not quite ready yet. Now, we have some indication as to perhaps why that is. It looks like the upcoming official Steam Deck Docking Station has had a stealthy pre-launch upgrade.
As highlighted by ReviewGeek, there has been a huge upgrade to the included USB-A ports on the Steam Deck Docking Station. When first revealed we were looking at a single USB 3.1 port joined by a pair of much slower USB 2.0 ports. Without any fanfare, Valve has upgraded those two USB 2.0 ports it seems to USB 3.1.
Why is this important? Any number of reasons, but when it comes to USB, speed is everything. USB 2.0 would have been OK for hooking up a mouse and keyboard, but the Steam Deck can be much more than just a handheld games console. Beneath that gamer-friendly exterior beats the heart of a full Linux desktop PC. You could conceivably use this thing as your desktop machine with all your favorite external storage and peripherals.
Storage is an important one, especially for those with larger Steam libraries. The built-in microSD card slot performs surprisingly well, but personally, I’ve got an external SSD I use to store my games as well. USB 3.1 will definitely help out with that. Likewise, a number of USB devices will simply require more than USB 2.0 to operate properly.
Valve has also clarified that the Steam Deck Docking Station will have Gigabit Ethernet, alongside the HDMI 2.0 and DisplayPort 1.4 outputs. The Steam Deck Docking Station is wanted by so many partly for its connectivity, but also for its design. Currently, I use my Steam Deck with one of my existing USB-C docks, but my desk is a mess of cables when doing so. The official Valve accessory is designed to hold the Steam Deck but also make it a lot neater with the cables. It’s an instant buy as soon as it goes on sale sometime this “Spring.”
Google on Thursday announced new changes to the cookie consent banner after being fined €150 million by European regulators earlier in January. Users visiting Search and YouTube in Europe while signed out or in incognito mode will soon see an updated cookie dialogue with reject all and accept all buttons.
Previously, the cookie choice screen gave users two options: “I accept” and “personalize.” While this allowed users to accept all cookies with a single click, they had to navigate through various menus and options if they wanted to reject all cookies. But now Google will give you three clear choices: “Accept all,” “Reject all,” and “more options,” making the process a whole lot straightforward. Both buttons will be displayed prominently and of the same size and color.
“This update, which began rolling out earlier this month on YouTube, will provide you with equal “Reject all” and “Accept all” buttons on the first screen in your preferred language,” wrote Google product manager Sammit Adhya in a blog post.
Google says they have kicked off the rollout of the new cookie banner in France and will be extending the change to all Google users in Europe, the U.K., and Switzerland soon. Note that this cookie popup will only appear if users are not signed in to a Google account or are using the incognito mode. If you’re signed in, you can review and change tracking options from Google’s “Data & privacy” page.
The change to cookie tracking comes a few months after France’s data protection agency CNIL fined Google €150 million ($170 million) for making the process of rejecting cookies unnecessarily confusing and convoluted for users. The French regulator felt that tech giants, including Google and Facebook, used manipulative patterns to force consent and ordered both companies to change how they presented cookies to users.
“Based on these conversations and specific direction from France’s Commission Nationale de l’Informatique et des Libertés (CNIL), we have now completed a full redesign of our approach, including changes to the infrastructure we use to handle cookies.”